You pull into your garage after a grueling 10-hour workday, desperate to just park and unwind. Instead, the familiar, infuriating crunch echoes through the cabin. You’ve just rolled right into your teenager’s mountain bike—which was leaning precariously against the lawnmower—knocking it directly into your pristine drywall.
In my ten-plus years of remodeling residential spaces, I’ve realized that the garage floor is the most violently contested real estate in the modern home. Everyone wants a piece of it: your sedan, the trash bins, the tool chests, and the family fleet of bicycles.
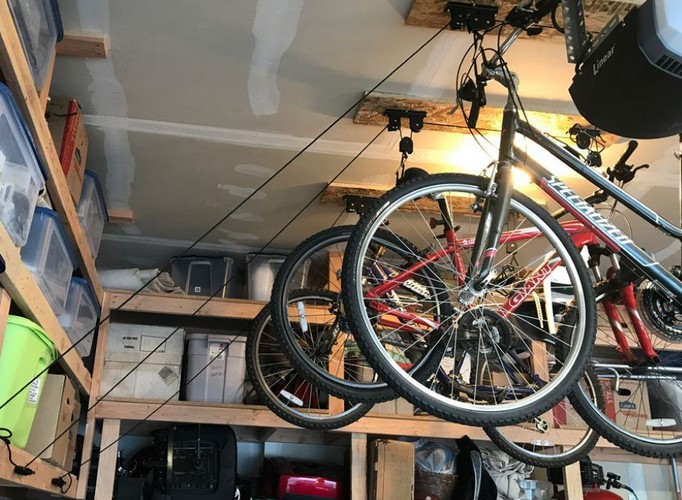
The mistake most homeowners make is thinking horizontally when they should be thinking vertically. Your garage ceiling is a vast, completely unutilized storage meadow waiting to be harvested. By strategically implementing a heavy-duty bike hoist ceiling system, you can lift those cumbersome metal frames completely out of your parking lane, unlocking premium floor space with a satisfying click of a pulley.
The Physics of Vertical Storage: How a Bike Hoist Defies Gravity
When people think of overhead bicycle storage, they usually picture those cheap, plastic-coated steel hooks that force you to awkwardly lift a 30-pound commuter bike over your head while balancing on a rickety stepladder. It’s a recipe for a pulled lower back muscle or a fractured toe.
A mechanical bike hoist ceiling system completely changes the game by utilizing basic physics to handle the heavy lifting for you.
The Mechanical Advantage Explained
At its core, an overhead hoist system relies on a network of pulleys to provide what we call mechanical advantage. Think of it like the low-gear setting on a 21-speed bicycle.
By routing a heavy-duty nylon rope through multiple dual-pulley brackets anchored to your ceiling joists, the system drastically cuts the perceived weight of your bicycle. If you are lifting a heavy 45-pound electric bike (e-bike), a standard 2:1 or 4:1 pulley ratio makes the load feel like a mere 11 to 22 pounds. Anyone in the family can lift a heavy trail bike to an 11-foot ceiling with just one hand.
Safe Weight Distribution
Standard overhead hoists are generally rated to support anywhere from 50 to 100 pounds. The engineering beauty of this setup lies in the split-hook design. One heavy-duty vinyl-coated hook secures around your bike’s handlebars, while the secondary hook cradles the rear seat post (saddle). This configuration distributes the physical deadweight evenly across two separate structural points on your ceiling.
Anatomy of a Secure Installation: Anchoring into Structural Framing
Over the years, I’ve had panicked clients call me because their DIY storage project suddenly came crashing down onto their car’s windshield. The culprit is never the hoist itself; it is almost always poor anchoring. Let’s look at how to secure your rig like a seasoned professional contractor.
      [ CEILING GYPSUM BOARD ]
   =================================  <-- Drywall Line
       [ WOOD JOIST / RAFTER ]        <-- Critical Structural Core
            |            |
            v            v
     [Lag Screw 1]   [Lag Screw 2]
            |____________|
                  ||
          [ HOIST BRACKET ]
Locating Your Ceiling Joists
Never anchor a bike hoist solely into drywall using plastic toggle bolts. Drywall is fundamentally made of compressed gypsum; it will fracture and fail under continuous tension.
You must fasten the mounting brackets directly into solid wood ceiling joists or structural engineered rafters. Use a high-quality deep-scanning stud finder to locate the exact center of the wood framing beam. Once located, mark the edges clearly before drilling any pilot holes.
The Alignment Equation
Bicycles come in all shapes and sizes, which means a one-size-fits-all mounting footprint does not exist.
-
Measure Wheelbase Centerlines: Measure the exact distance from the center of your handlebars to the back edge of your seat saddle.
-
Transfer to the Ceiling: Space your two ceiling pulley brackets exactly at this measured distance. If your ceiling joists run perpendicular to the bicycle’s orientation, you can mount the brackets directly to the framing.
-
The Spanning Board Trick: If your ceiling joists run parallel to the bike and don’t align with your measurement, simply screw a 2×4 solid wood spanning board across two joists first, then mount your bike hoist ceiling brackets directly onto that backing board.
System Configurations: Choosing Your Mechanical Setup
Not all hoist systems are manufactured equally. Depending on your garage ceiling height and the frequency of your cycling trips, you’ll want to select the right tier of gear.
+-----------------------------------------------------------------------+
|                    CEILING HOIST CONFIGURATIONS                       |
+---------------------------+-------------------------------------------+
| Standard Dual-Pulley      | Budget-friendly, reliable, independent line|
+---------------------------+-------------------------------------------+
| Integrated Wall-Cleat     | High safety profile, manual tie-off wrap  |
+---------------------------+-------------------------------------------+
| Freestanding Track System | Multi-bike capacity, sliding lateral rail |
+---------------------------+-------------------------------------------+
The Standard Rope-Lock Hoist
This is the most common consumer configuration. It features an integrated, gravity-activated rope brake built into the ceiling bracket. When you pull the rope to raise the bicycle, the internal locking mechanism allows the cord to move in only one direction. If you accidentally let go of the line mid-lift, the brake immediately pinches the rope shut, stopping the bicycle from plummeting downward.
Heavy-Duty Crank or Electric Hoists
For luxury garages or users dealing with heavy cargo bikes or vintage steel cruisers, manual rope pulls might still feel like too much chores. Motorized ceiling hoists utilize a small electric motor plugged into a standard 120V outlet. With a click of a wireless remote control or a smartphone app, your bike glides up to the rafters effortlessly.
Step-by-Step Blueprint for a Flawless DIY Install
Ready to clear out that garage clutter? Grab your tools and follow this straightforward structural workflow:
-
Prep the Workspace: Clear out any vehicles or floor bins underneath your targeted ceiling area. You need a stable footprint for an A-frame ladder.
-
Map the Joists: Find your structural wood joists, drill 3/16-inch pilot holes into the center of the wood, and mount the main pulley plates using heavy-duty 2.5-inch steel lag screws.
-
Thread the Logistics Line: Route your heavy-duty nylon rope through the stationary pulley, down through the hook assembly, and back up through the locking brake assembly according to the manufacturer’s specific diagram.
-
Install the Security Wall Cleat: Mount the safety tie-off cleat to a wall stud roughly 4 to 5 feet off the ground. This gives you a secondary structural point to wrap the excess rope securely out of reach of curious children.
The Pitfalls Showrooms Gloss Over
The Component Straining Phenomenon
Many amateur installers hook the pulley lines directly to the aluminum rims or the delicate rubber brake lines of their high-end road bikes. Over weeks of hanging under tension, this misplaced stress can warp your wheel alignment or pinch your hydraulic fluid cables, destroying your bike’s stopping power. Always ensure the heavy-duty vinyl hooks pull exclusively against structural metal frame components, the main stem of the handlebars, or the reinforced metal rails underneath the saddle padding.
-
Mind the Vertical Clearance: Before purchasing a bike hoist ceiling system, measure your garage ceiling height. A standard adult mountain bike hangs down roughly 30 to 36 inches from the ceiling when hoisted. If you have a low 8-foot ceiling, hanging a bike above your SUV could block your garage door track or scrape against your vehicle’s roof rack. You ideally want a 9-to-12-foot ceiling for optimal clearance.
-
The Dry-Rot Danger Zone: Garages get incredibly hot during summer months, and heat rises directly to the ceiling line. If you leave high-performance road racing bikes stored near a hot roof for months at a time, the intense ambient heat can dry-out and crack the specialized rubber tires. If storing long-term over the summer, deflate the inner tubes slightly to minimize casing stress.
Conclusion: Reclaim Your Garage Domain
Investing an afternoon into installing a strategic bike hoist ceiling system changes how you interact with your utility space. By understanding the mechanical advantage of dual-pulleys, properly mapping your structural wood ceiling joists, and keeping your bike’s hydraulic lines safe from hook tension, you maximize your storage capacity while preserving your car’s bumper from accidental bumps.
Now, I want to hear from you. How many bicycles are currently cluttering up your garage pathways, and what kind of ceiling height are you working with? Drop your questions or installation concerns in the comments section below!
