Last summer, during a particularly brutal heatwave, I watched my neighbor’s lawn turn into a crispy, golden brown carpet while his water bill soared into the hundreds. Meanwhile, my garden was thriving, vibrant, and—most importantly—completely “off-grid” in terms of irrigation. The difference wasn’t a magic green thumb; it was the three 55-gallon drums sitting quietly under my downspouts. Did you know that just one inch of rain on a 1,000-square-foot roof can yield over 600 gallons of water? That is essentially free money falling from the sky, yet most homeowners let it flush straight into the storm drains.
In my decade of hands-on home improvement, I’ve installed everything from smart thermostats to solar arrays, but a Rain Barrel Setup remains my favorite “gateway” project for sustainable resource management. It’s low-cost, high-impact, and offers a tangible return on investment (ROI) that you can see every time you skip turning on the outdoor faucet.
The Logistics of Rainwater Harvesting: Why It’s Not Just a Bucket
To the uninitiated, harvesting rain sounds like putting a bucket under a leak. In reality, a professional Rain Barrel Setup is a closed-loop system designed to manage pressure, filtration, and overflow. When we talk about “Utility ROI,” we aren’t just talking about saving a few dollars on the water bill; we are talking about protecting your home’s foundation from erosion and providing your plants with chlorine-free “soft” water that city pipes simply can’t match.
The Battery Analogy
Think of a rain barrel as a physical battery for your backyard. Your roof is the solar panel that collects the energy (water), and the barrel is the storage cell. You “charge” the battery during a storm and “discharge” it during a dry spell. Without the storage, that energy is wasted. By implementing a storage system, you stabilize your garden’s “grid” and reduce your dependence on the municipal supply.
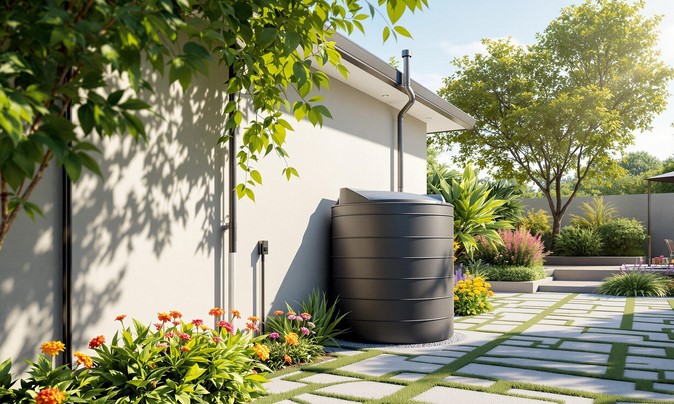
Engineering the Perfect Rain Barrel Setup
If you want a system that lasts longer than a single season, you have to move beyond the “hole-in-the-lid” method. I’ve seen those DIY disasters—they become mosquito breeding grounds and eventually tip over because the homeowner didn’t respect the physics of water weight.
1. The Foundation and Gravity Logistics
A full 55-gallon barrel weighs approximately 460 pounds. If you place that on soft soil or a few loose bricks, it will lean, and it will crack your downspout.
-
Pro Insight: I always build a leveled base using solid concrete pavers or pressure-treated 4×4 timber.
-
Elevation: Gravity is your pump. For every foot you raise the barrel off the ground, you increase the water pressure at the spigot. I recommend at least two feet of elevation if you plan on attaching a soaker hose.
2. The Diverter vs. The Cut-Off
Most beginners make the mistake of cutting their downspout and shoving it into the top of the barrel. This leads to massive overflow issues during heavy downpours.
-
The Solution: Use a Downspout Diverter. These clever devices sit inside the gutter pipe and use surface tension to guide water into the barrel. Once the barrel is full, the water “backs up” and naturally continues down the original downspout. No manual switching, no flooded basements.
3. Filtration and Vector Control
If you don’t filter the water, your barrel will become a soup of asphalt shingles, bird droppings, and mosquito larvae.
-
Debris Screen: A fine stainless steel mesh at the entry point is mandatory.
-
The “First Flush” Logic: The first 10 minutes of rain are the dirtiest. Some advanced setups use a “first-flush diverter” that sends the initial dirty water to the ground and only starts filling the barrel once the roof is rinsed clean.
Maximizing ROI: Strategic Water Distribution
To get the best return on your Rain Barrel Setup, you need to use the water efficiently. It’s not just about filling a watering can; it’s about integrated irrigation.
-
Soaker Hose Integration: By connecting a low-pressure soaker hose to your barrel, you can provide deep, slow hydration to your flower beds overnight.
-
Linking Barrels (Daisy Chaining): One barrel fills up fast. I often link three barrels together using a “bottom-link” kit. This allows all three barrels to fill and drain at the same rate, effectively tripling your storage capacity with a single downspout connection.
Expert Advice: The “Invisible” Risks of Rainwater
While rainwater is amazing for plants, it carries some technical “logistics” that you must respect to keep your home safe.
Tips Pro: Never use harvested rainwater for “potable” purposes (drinking or cooking) unless you have a high-grade UV sterilization and filtration system. Roofs collect heavy metals and bacteria. However, for washing your car or watering your lawn? It’s better than tap water because it lacks the salts and fluoride found in city supplies.
The Foundation Danger: If your overflow isn’t managed correctly, you are dumping 500+ gallons of water directly at the base of your house. I once spent three days repairing a client’s “budget” rain barrel setup that had washed out the soil beneath their foundation. Always ensure your overflow pipe directs water at least 6 feet away from the house.
Maintenance for Long-Term Performance
A Rain Barrel Setup is a rugged piece of infrastructure, but it requires a “seasonal audit” to maintain its ROI.
-
The Winter Drain: If you live in a climate where the ground freezes, you must drain your barrels in late autumn. Water expands when it freezes, and a full barrel will split like an overfilled ice tray.
-
The Sludge Clean-Out: Once a year, tip the barrel over and spray out the “bio-sludge” that settles at the bottom. This prevents your spigot from clogging.
-
Check the Seals: Inspect your bulkhead fittings and gaskets for leaks. A slow drip can lose 20 gallons a day—that’s your ROI literally leaking away.
Summary: A Small Step for Sustainable Management
Implementing a Rain Barrel Setup is more than just a weekend project; it’s a commitment to smarter resource management. By capturing what nature provides, you protect your property from runoff damage, nourish your plants with high-quality water, and lower your monthly utility costs.
In my years of home improvement, I’ve found that the most rewarding projects are the ones that work for you while you sleep. Every time it rains, your “water battery” is charging, and your garden is getting a free upgrade. It’s an easy win for your wallet and the environment.
Are you ready to stop letting your roof’s potential go down the drain, or are you worried about local regulations regarding rainwater harvesting? Drop a comment below with your zip code or your garden size, and let’s figure out how many gallons of ROI you can capture this season!

