The smell of ozone and scorched pine is something you never forget. I was three years into my career, trying to install a 4-inch vent through a double-thick subfloor using a standard spade bit and a lot of prayer. Ten minutes later, I had a smoking drill motor, a jagged, splintered hole, and a bruised wrist from the drill “kicking back” when it caught a knot. That was the day I stopped “making do” and invested in a professional-grade Hole Saw Kit.
In the world of home improvement, there is a massive difference between making a hole and engineering an aperture. Whether you are running HVAC ducting, installing a deadbolt, or creating clean entries for electrical conduit, your choice of boring tool determines the structural integrity and aesthetic finish of the project.
If you’ve ever felt your drill wrench out of your hand or watched a bit wander across a finished surface like a drunk ice skater, this guide is for you. We’re going to master the physics of the hole saw.
The Geometry of the Cut: Why a Hole Saw Kit is Essential
Most drill bits work by “chipping” away the entire volume of a hole into sawdust. A Hole Saw Kit, however, is far more efficient. It is essentially a flexible saw blade bent into a perfect circle.
Think of it like a cookie cutter versus a spoon. A spoon (spade bit) has to dig out every bit of dough to make a hole. A cookie cutter (hole saw) only cuts the perimeter, leaving a solid “plug” behind. This allows you to create large-diameter holes with significantly less torque and power consumption.
The Anatomy of the Kit
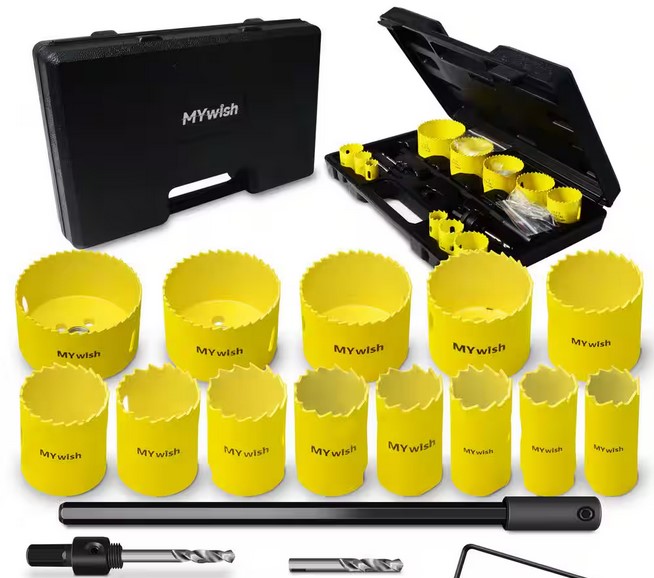
A standard Hole Saw Kit isn’t just a collection of metal cups. It’s a system consisting of three critical components:
-
The Cylinder (The Saw): The serrated cup that does the cutting.
-
The Arbor (The Mandrel): The “spine” that connects the saw to your drill.
-
The Pilot Bit: The small drill bit in the center that keeps the saw from walking.
Selecting Your Edge: Bi-Metal, Carbide, and Diamond
Not all kits are created equal. I’ve seen homeowners try to cut through a stainless steel sink with a wood-rated carbon steel saw. The result is a ruined saw and a very expensive scratch on the sink.
1. Bi-Metal Hole Saws (The Workhorse)
These are what you’ll find in 90% of a pro’s truck. They feature high-speed steel (HSS) teeth bonded to a flexible steel body. They are tough, handle “nail-embedded wood” brilliantly, and are perfect for aluminum and thin mild steel.
2. Carbide Tipped (The Heavy Hitter)
If you are boring into fiber cement siding (like HardieBoard), cast iron, or thick hardwoods, carbide is your best friend. It stays sharp up to 10 times longer than bi-metal but is more brittle—drop it on a concrete floor, and you might chip a tooth.
3. Diamond Grit (The Specialist)
When the job involves porcelain tile, glass, or stone, you aren’t “cutting” so much as you are “grinding.” These saws don’t have teeth; they have a rim of industrial diamonds. Always use water with these to prevent thermal cracking.
Mastering Torque: How to Avoid the “Wrist-Snap”
The most common injury I see with a Hole Saw Kit isn’t a cut; it’s a sprained wrist. Because a hole saw has a large surface area, if it catches on a nail or a burr, the energy has to go somewhere. If the saw stops spinning, the drill starts spinning—taking your arm with it.
The “Clutch” Secret
In my 10+ years on-site, I never use a hole saw larger than 2 inches without a drill that has a side-handle.
-
Low Speed, High Torque: Always switch your drill to “Gear 1.” High speed (Gear 2) will just friction-weld your saw to the wood, causing it to smoke and dull instantly.
-
The “Pendulum” Technique: Don’t just push straight in. Gently rock the drill in a slight circular motion. This clears the sawdust (swarf) out of the kerf, preventing heat buildup and jamming.
Advanced Operations: The “Double-Sided” Clean Cut
One side of your hole will always look better than the other. The “exit side” usually suffers from blowout, where the wood fibers splinter as the saw pushes through.
The Pro Method for Perfect Holes:
-
Drill your pilot hole all the way through the material.
-
Cut from the “beauty side” until the saw is about halfway through.
-
Go to the other side, insert the pilot bit into the existing hole, and finish the cut from the back.
This ensures both faces of the wood are crisp, clean, and professional.
Maintenance and Efficiency: Getting the “Plug” Out
We’ve all been there: you finish the hole, and now a 2-inch thick wooden puck is jammed inside the saw. You spend 20 minutes poking it with a screwdriver.
Expert Insight: Look for a Hole Saw Kit with “large-access slots” on the sides. Better yet, buy a kit with a quick-release arbor. Some modern kits allow you to slide the saw back and literally “pop” the plug out in seconds. If you’re stuck with an old-school saw, rub a little bit of beeswax or WD-40 on the inside of the cup before you start cutting. The plug will slide right out.
Expert Advice: The “Hidden Warning” of Heat
Heat is the silent killer of your Hole Saw Kit. If you see blue discoloration on the teeth of your saw, you’ve “tempered” the metal—meaning it’s now soft and will never hold an edge again.
Tips Pro: When cutting metal, use cutting oil. If you’re cutting wood and it starts to smoke, back off! Let the saw spin in the air for 5 seconds to let the internal fan of the drill cool the motor and the centrifugal force clear the dust.
Summary Table: Speed Selection Guide
| Material | Saw Type | RPM Range | Lubrication |
| Softwood | Bi-Metal | 500 – 800 | None |
| Mild Steel | Bi-Metal | 100 – 200 | Cutting Oil |
| Ceramic Tile | Diamond | 100 – 300 | Water |
| Hardwood | Carbide | 300 – 500 | None |
Scannable Setup Checklist
-
Verify the Arbor: Ensure the pins are engaged in the saw holes to prevent over-tightening.
-
Check the Pilot: Ensure the pilot bit extends at least 1/2-inch past the teeth.
-
Clear the Area: Check the “exit” side of the wall for electrical wires or plumbing.
-
Brace Yourself: Use two hands and a wide stance to manage the torque.
-
Clear the Swarf: Pull the saw out frequently during deep cuts to dump the dust.
Conclusion: Engineering Better Outcomes
A Hole Saw Kit is more than just a convenience; it is a fundamental shift in how you approach home infrastructure. By understanding the relationship between material hardness, RPM, and heat management, you move from a “hacker” to a “builder.”
When you can bore a perfect 3-inch hole through a cabinet without a single splinter, you aren’t just doing DIY—you’re practicing precision engineering. Your house is a collection of systems; treat them with the tools they deserve.
What’s the toughest material you’ve ever had to bore through? Are you struggling with “plug jams” or drill kickback? Let’s troubleshoot your boring operations in the comments!