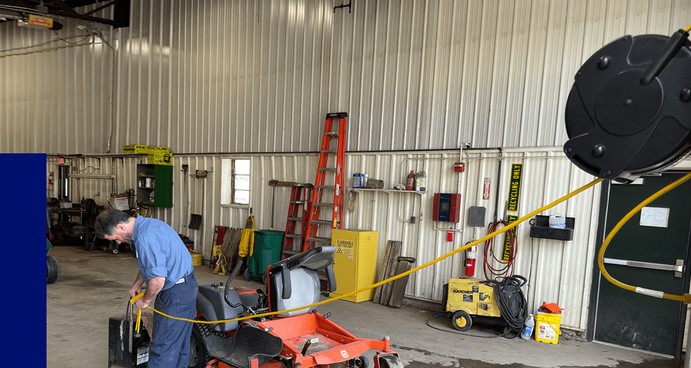
I was touring a client’s newly expanded woodworking shop a few winters ago when I watched a seasoned craftsman trip over a tangled web of heavy-duty extension cords. He scrambled, caught himself on a workbench, and narrowly missed a spinning table saw blade. The culprit? Fifty feet of 12-gauge rubber cable left coiled like a nest of black snakes right across the primary walkway.
In my ten-plus years in home improvement and shop layout optimization, I’ve seen this exact scene replay in countless garages, basements, and commercial facilities. According to OSHA, trip-and-fall hazards account for nearly one-third of all workshop injuries, with loose electrical lines being a chief offender. Beyond the immediate physical danger, unspooled cords dragged across concrete floors suffer outer-jacket abrasion, conductor fatigue, and premature insulation breakdown.
Integrating a heavy-duty cord reel wall mount into your workspace isn’t just about keeping things neat; it’s a critical safety protocol that protects your gear, optimizes workflow, and extends the lifespan of your power infrastructure. Let’s dive into the mechanics, electrical ratings, and step-by-step installation strategies needed to do it right.
The Physics of Coiled Power: Why Heat and Length Matter
Before mounting any bracket to your studs, we need to address a silent hazard that catches many DIY enthusiasts off guard: resistance heating inside a partially unreeled cable.
Think of a fully coiled extension cord under a high power load as an electric heating element in a toaster. When electricity flows through copper conductors, natural electrical resistance produces heat. If the cord stays wrapped tightly around a drum, that thermal energy gets trapped in the center layers without ambient airflow to cool it down.
       [ Wall Bracket / 180° Swivel Mount ]
                        ||
                        \/
 +----------------------------------------------+
 |  Retractable Drum & Torsion Spring Assembly  |
 |  (Trapped Thermal Energy Zone if Coiled)     |
 +----------------------------------------------+
                        ||
                        \/
         12/3 AWG Heavy-Duty SJTOW Cable
 (Fully Unwind Under High Load to Prevent Melting)
This thermal accumulation can soften the thermoplastic insulation, leading to internal short circuits or catastrophic melting. Utilizing a wall-mounted retractable reel allows you to pull out the exact length needed while keeping the remaining line supported, but understanding your tool’s amperage draw is key to preventing thermal overload.
-
Conductor Gauge (AWG): Lower numbers mean thicker copper wire. A 12 AWG cable carries high-amperage power tools far better than a thin 16 AWG cord.
-
Jacket Classifications: Look for cords stamped with SJTOW (Service Junior, Thermoplastic, Oil-resistant, Weather-resistant) for shop environment durability.
-
Continuous Load Factor: Always fully unspool your cord when running continuous high-draw equipment like air compressors or table saws for extended periods.
Selecting the Right Cord Reel Wall System
Not all retractable units belong in a busy shop environment. Choosing the wrong mechanism for your workflow will lead to premature spring failure or continuous breaker trips.
| Feature / Spec | Light-Duty Consumer Reels | Heavy-Duty Industrial Reels |
| Wire Gauge (AWG) | 16 AWG to 14 AWG | 12 AWG to 10 AWG |
| Housing Material | Molded ABS Plastic | Powder-Coated Steel / Structural Poly |
| Retraction Mechanism | Light Tension Spring | Enclosed Steel Torsion Spring with Ratchet Lock |
| Circuit Breaker | Integrated 10A – 13A Reset | Heavy-Duty 15A – 20A Thermal Reset |
1. Spring-Driven Retractable Units
These are the industry standard for overhead and wall-mounted shop setups. They utilize an internal steel torsion spring that automatically rewinds the line when given a brief tug.
-
Best used for: High-frequency daily use in garages, woodshops, and automotive bays.
-
Key feature to look for: A 180-degree heavy-gauge steel swivel bracket that allows the reel to pivot smoothly in the direction of your movement, eliminating side-pull friction on the cable guide.
2. Manual-Crank Wall Mounts
While lacking automatic spring retraction, manual-crank units handle exceptionally long cable lengths (up to 100+ feet) and thicker 10 AWG power lines without mechanical spring fatigue.
-
Best used for: Large outdoor construction spaces or high-amp heavy machinery setups.
Step-by-Step Installation Protocol: Securing Your Mount
A fully extended 50-foot reel exerts significant dynamic lever action when pulled at an angle. Anchoring your cord reel wall assembly into solid structural framing is mandatory.
Step 1: Locate and Mark Structural Studs
Never rely on drywall anchors or hollow wall toggle bolts for a retractable reel. Use an electronic stud finder to locate the center of a $2\times4$ or $2\times6$ wall stud. If mounting to concrete block, use masonry expansion anchors rated for high sheer loads.
Step 2: Mount a Backer Board for Load Distribution
When mounting to timber studs, I always install a $2\times6$ Douglas fir backer board spanned across two parallel framing studs using $3\frac{1}{2}$-inch structural lag screws. This creates a rock-solid foundation and allows you to center your reel precisely where you want it, regardless of stud placement.
Step 3: Fasten the Swivel Bracket and Adjust the Cord Stopper
Secure the reel’s mounting plate to your backer board using heavy-duty lag bolts and flat washers. Once hung, adjust the rubber ball cord stopper along the cable so the triple-tap outlet hangs within comfortable standing reach without dangling into head-strike clearance zones.
[ Step 1: Backer Board ]             [ Step 2: Bracket Anchor ]
  Span across two studs                Fasten swivel plate
+----------------------------+       +----------------------------+
| Drive $3.5" $ lag screws   | ====> | Secure with washers & bolts|
| Create high-shear base     |       | Test $180^\circ$ pivot clearance|
+----------------------------+       +----------------------------+
Pro Tips
Pro Tip: The Overhead Drop Line Offset
If your workshop ceiling is 10 feet or higher, consider mounting your cord reel wall bracket near the ceiling joist junction and dropping the outlet lead down over your main assembly table. This keeps the entire supply line completely out of all floor walking zones while providing $360^\circ$ overhead access to your power tools.
The Internal Slip-Ring Arc Hazard
Retractable reels pass electrical current from the stationary housing to the spinning drum using internal brass contact rings and carbon brushes (slip rings). Never tug or retract the cord while high-amperage tools are actively running under load! Arcing across the spinning contact rings under full electrical load causes pitting, increases internal electrical resistance, and dramatically shortens the unit’s lifespan.
Reclaiming Safety and Workflow Efficiency
Transforming your shop floor into a safe, organized environment isn’t about expensive overhauls—it’s about smart infrastructural choices. Installing a dedicated cord reel wall mount eliminates tripping hazards, protects your costly heavy-gauge extension cords, and puts reliable power exactly where you need it with zero setup delay.
How are you currently managing power cables and extension cords in your garage or shop layout? Have you ever had a close call with a tangled cord or struggled with spring tension on your tools? Share your setup photos and questions in the comments below—I’d love to help you optimize your workspace!