
You’re hosting a quiet weekend barbecue on your patio, laughing with close friends, when you look up and make direct, uncomfortable eye contact with your neighbor hanging laundry just ten feet away. Or perhaps you’re trying to enjoy morning coffee in your pajamas while feeling like you’re performing on a stage for every passing car on the street.
In my ten years of hands-on property enhancement—designing outdoor living spaces and establishing living perimeters—losing personal sanctuary space is the single biggest complaint I hear from suburban homeowners. Most people jump straight to installing an industrial wood or vinyl fence, only to find it creates a claustrophobic “prison yard” effect, costs a small fortune, and often runs afoul of municipal height restrictions.
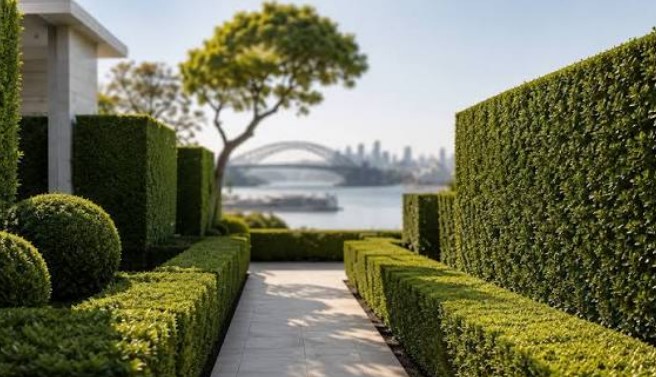
The most elegant, cost-effective, and environmentally beneficial solution to reclaiming your yard is establishing a living green wall using high-performance privacy hedge plants.
Let’s take a deep dive into how you can select, plant, and maintain a botanical screen that turns your property into a secluded private retreat.
The Living Wall Advantage: Why Green Barriers Outperform Fences
Think of a solid wooden fence as a static, rigid acoustic reflector. When wind, street noise, or sightlines hit a hard wooden board, sound bounces right over, and wind creates harsh turbulence on the other side.
In contrast, an engineered border of privacy hedge plants acts like an acoustic sponge and natural baffle system. The complex, overlapping branch structures and dense foliage absorb ambient neighborhood noise, diffuse heavy wind gusts, and trap dust particles before they reach your outdoor dining area.
Throughout my field projects, replacing static fences with living screens offers key advantages:
-
Unlimited Vertical Clearance: Most residential zoning laws cap hard fences at 6 feet, whereas living screens can reach 10 to 20 feet legally.
-
Natural Climate Regulation: Transpiration from live foliage lowers surrounding ambient summer temperatures, unlike hot vinyl or wood panels.
-
Property Value Boost: Mature, well-maintained landscaping consistently yields higher long-term appraisal returns than aging timber fencing.
-
Ecosystem Support: Provides essential shelter and nesting space for songbirds while acting as a natural windbreak.
Anatomy of a High-Performance Living Screen
Designing a living barrier isn’t just a matter of digging holes and dropping in green shrubs. It requires understanding soil physics, root development, and light competition.
+--------------------------------------------------------+
|          LIVING PRIVACY HEDGE ANATOMY LAYERS           |
+--------------------------------------------------------+
| [ Upper Canopy    ]  Dense Foliage / Sunlight Absorption |
| [ Internal Branch ]  Overlapping Baffle / Noise Reduction|
| [ Root Zone       ]  Mulched Soil / Drip Irrigation      |
| [ Foundation Sub  ]  Aerated Substrate / Root Barrier    |
+--------------------------------------------------------+
Critical Technical Terms (LSI Keywords) to Know
Understanding these botanical and landscape engineering terms will help you master your green screen layout:
-
Evergreen vs. Deciduous: Evergreens retain foliage year-round for 365-day screen density, whereas deciduous plants drop leaves in autumn.
-
Root Ball & Flare: The cluster of roots and soil at the base of the plant; the flare is where the main trunk expands before entering the soil.
-
Hardiness Zones: Geographically defined climate zones indicating a plant’s ability to withstand minimum winter temperatures.
-
Soil Aeration & Drainage: The capacity of soil to hold oxygen pockets between soil particles while allowing excess water to drain freely.
-
Root Pruning & Air Pruning: Techniques used to encourage dense, compact root systems that prevent aggressive invasive spread.
Step-by-Step Blueprint: Installing Your Privacy Hedge Plants
Building a dense, long-lasting botanical wall requires careful spacing and proper soil preparation. Follow this tested workflow to set up your living perimeter:
Step 1: Analyze Soil, Light, and Drainage
Before purchasing nursery stock, test your site’s growing conditions.
-
Dig a 12-inch test hole and fill it with water to measure drainage speed. If water sits for more than 4 hours, amend heavy clay soil with organic compost and coarse sand.
-
Observe sunlight hours across the planting trench (6+ hours for sun-loving species like Emerald Green Arborvitae; partial shade for Holly or Yew).
Step 2: Select the Right Cultivar
Match the plant profile to your maintenance commitment and physical footprint:
-
Thuja ‘Green Giant’ (Arborvitae): Rapid grower (3 to 4 feet per year), handles heavy snow loads, excellent for large perimeter boundaries.
-
Skip Laurel (Prunus laurocerasus): Broadleaf evergreen featuring thick, glossy leaves; thrives in partial shade and tolerates heavy pruning.
-
Boxwood or Taxus Yew: Perfect for structured, formal, lower-profile boundary lines (4 to 8 feet high).
Step 3: Digging the Trench (The 2x Width Rule)
Never dig individual round holes that barely fit the pots.
-
Excavate a continuous planting trench twice as wide as the root balls, but no deeper than the height of the root ball itself.
-
Score or scarify the trench sides with a spade so roots can penetrate the native surrounding soil easily.
Step 4: Staggered Double-Row Planting Layout
If space permits, avoid planting in a single straight line.
-
Plant your privacy hedge plants in a staggered zig-zag pattern (offsetting two parallel lines).
-
This technique creates a thicker, multi-dimensional screen in half the time and prevents a single dead plant from leaving an obvious gap in your wall.
Step 5: Irrigation and Mulch Application
-
Install a perforated drip irrigation hose along the base of the hedge line to deliver water directly to the root zones.
-
Apply a 3-inch layer of organic hardwood mulch across the trench to retain soil moisture and suppress competing weeds, keeping mulch 2 inches away from main trunks.
Expert Advice: Pro Tips & Hidden Warnings
PRO TIP: The Tapered Pruning SecretWhen trimming your hedge in early spring, always prune the top slightly narrower than the base (an A-frame shape). If the top grows wider than the bottom, it blocks sunlight from reaching the lower branches, causing the bottom foliage to turn thin, woody, and bare over time.
⚠️ Hidden Warning: Beware of Planting Too Deep
The most common mistake DIYers make is burying the root flare beneath soil and mulch. If you plant a shrub too deep, moisture gets trapped against the lower bark, leading to root rot and fungal decay within two seasons. Always ensure the root flare sits slightly (1 inch) above the surrounding finished soil grade.
Species Selection Guide: Finding Your Perfect Match
Choosing the right species ensures your screen thrives without demanding constant pruning maintenance:
| Plant Species | Growth Rate | Foliage Type | Sun Requirement | Ideal Height Range |
| Thuja ‘Green Giant’ | 🚀 Very Fast (3-4 ft/yr) | Evergreen Needle | Full Sun to Partial Shade | 15 – 30+ feet |
| Emerald Green Arborvitae | 🐢 Moderate (6-12 in/yr) | Evergreen Needle | Full Sun | 8 – 12 feet |
| Skip Laurel | 📈 Fast (1-2 ft/yr) | Broadleaf Evergreen | Full Sun to Full Shade | 6 – 10 feet |
| Privet (Ligustrum) | 🚀 Very Fast (2-3 ft/yr) | Semi-Evergreen | Full Sun to Partial Shade | 8 – 15 feet |
| American Holly | 🐢 Slow (6 in/yr) | Broadleaf Evergreen | Full Sun to Partial Shade | 10 – 20 feet |
Conclusion: Reclaim Your Outdoor Sanctuary
Creating privacy around your home doesn’t require building sterile, grey wooden walls or sacrificing connection with nature. By selecting high-quality privacy hedge plants, preparing your soil correctly, and following smart staggered planting methods, you build a growing, living barrier that enhances property value, dampens noise, and restores absolute seclusion to your yard.
Are you planning to establish a living screen around your property line this season, or are you troubleshooting an existing hedge that has grown thin?
Drop a comment below with your climate zone and yard dimensions, and let’s design your custom green screen together!