
Picture this: you are standing on a steep 8/12 pitch roof, forty feet in the air, with dark storm clouds rolling in fast over the horizon. Every second counts, every step requires focus, and your balance relies entirely on your foot traction and your hand equipment. In that high-stakes environment, reaching for a standard claw hammer isn’t just inefficient—it can be downright dangerous.
Over my ten years in residential and commercial roofing installation, I’ve seen eager DIYers and rookie apprentices try to lay shingles using standard framing or finish hammers. Within two hours, their wrists are fatigued, shingle exposures are crooked, and half the nails are over-driven through the fiberglass mat.
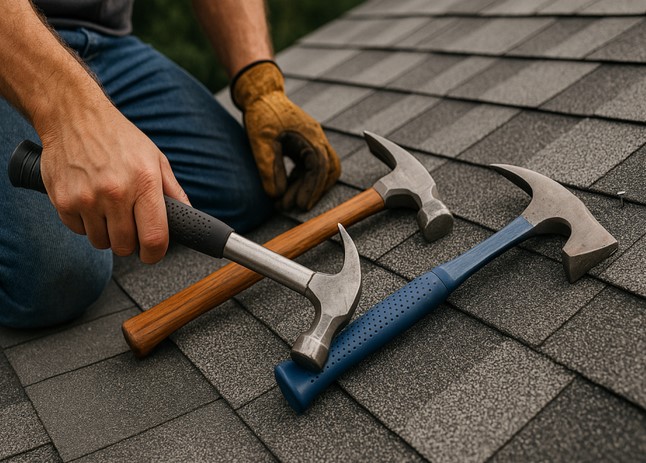
The humble yet engineered roofing hammer tool (often called a hatchet) is the unsung hero of industrial roofing engineering. It is not just a striking instrument; it is a multi-functional measuring, cutting, splitting, and driving system designed specifically for overhead efficiency.
Let’s break down how this specialized tool works, why its design matters, and how you can master its operation like an industry veteran.
Anatomy of Precision: Why the Standard Hammer Fails Overhead
Think of a standard claw hammer as a sledgehammer built for flat, ground-level carpentry. It is weighted toward the head to drive large framing nails through dimensional lumber, but its smooth face and straight claw offer zero utility on an asphalt or slate roof.
In contrast, a professional roofing hammer tool is balanced like a surgeon’s scalpel. It integrates multiple single-task instruments into a single ergonomic housing, eliminating the need to constantly swap tools while balancing on an incline.
+--------------------------------------------------------+
|          ROOFING HAMMER TOOL FUNCTIONAL ANATOMY        |
+--------------------------------------------------------+
| [ Milled / Magnet Face ] Anti-Slip Nail Driving        |
| [ Adjustable Gauge Pin ] Precision Exposure Measurement|
| [ Utility Hatchet Blade ] Shingle Trimming / Slate Cut |
| [ Pry Notch / Claw     ] Rapid Fastener Extraction     |
+--------------------------------------------------------+
During my time on job sites, I’ve observed three critical reasons why using the correct specialized hammer transforms roofing productivity:
-
Reduced Muscle Fatigue: Ergonomic weight distribution reduces wrist strain during thousands of repetitive overhead strikes.
-
Consistent Fastener Depth: Specialized striking faces minimize over-driven nails that tear through weatherproofing membranes.
-
Integrated Measurement: Adjustable gauges eliminate the need to pull out a measuring tape for every single shingle course.
Technical Elements: Demystifying the Roofing Hammer
To appreciate how a roofing hammer tool optimizes performance, you need to understand its key mechanical components and engineering features.
Key Technical Terms (LSI Keywords) to Know
-
Milled Strike Face: A textured, waffle-patterned hammer head face designed to grip nail heads firmly, preventing slipping off wet metal heads in slick conditions.
-
Shingle Exposure Gauge: An adjustable sliding or threaded pin on the blade that measures the exposed distance (typically 5 or 5-5/8 inches) between shingle courses.
-
Underlayment Membrane: The waterproof synthetic or felt barrier installed beneath shingles to prevent leak migration.
-
Pneumatic Coil Nailer: Compressed-air nail guns; while popular, manual roofing hatchets remain superior for detail flashing, ridge caps, and repair work.
-
Over-Driven Fastener: A nail driven too deep into the shingle, tearing through the mat and eliminating its holding power against strong winds.
The Master’s Guide: How to Work with a Roofing Hammer Tool
Whether you are repairing storm damage or tackling a complete shed or house roof overhaul, working with a roofing hammer tool requires specific techniques to ensure speed, accuracy, and safety.
Step 1: Calibrate Your Shingle Exposure Gauge
-
Measure the manufacturer’s recommended exposure on your shingle profile (standard architectural shingles usually call for a 5-5/8 inch reveal).
-
Loosen the gauge pin on the hatchet blade, slide it to the matching distance mark on the tool head, and tighten it down firmly.
-
When laying new courses, hook the pin onto the bottom edge of the previous shingle row to instantly locate the top placement line for the next shingle without drawing chalk lines every time.
Step 2: Master the Two-Strike Driving Technique
-
Place the roofing nail flat against the shingle’s reinforced nailing strip.
-
Use a light tap with the milled face to set the nail point through the shingle mat into the wooden deck sheathing.
-
Follow with a firm, centered second strike to seat the nail head flush against the surface.
-
Avoid over-striking: The nail head should sit flush against the shingle surface without crushing or slicing into the asphalt granules.
Step 3: Utilizing the Hatchet Edge for Clean Trimming
-
When reaching rake edges, valleys, or dormers, flip the tool around to use the hardened hatchet blade.
-
Score the back or front of asphalt shingles along your cut line, or notch slate and cedar shakes directly with controlled, light taps.
-
Use the integrated pry notch near the blade heel to pull bent fasteners without damaging surrounding roofing material.
Expert Advice: Pro Tips & Hidden Warnings
PRO TIP: The Magnetic Face AdvantageInvest in a roofing hammer tool equipped with a magnetic head slot. This allows you to set nails one-handed high above your head or along steep rake edges, keeping your free hand securely anchored to the roof deck, safety ladder, or scaffolding harness.
⚠️ Hidden Warning: Watch Out for Cold-Weather Brittle Shingles
In cold weather below 40°F (4°C), asphalt shingles become extremely brittle. Hitting a cold shingle with the full force of a heavy steel hammer head will shatter the fiberglass backing. On cold days, adjust your striking force to be lighter and rely on sharp, clean scores with the hatchet blade rather than aggressive chopping.
Roofing Hammer vs. Pneumatic Coil Nailer: A Practical Comparison
While power tools are common on modern job sites, manual precision hammers remain irreplaceable for specific application scenarios:
| Factor / Feature | Roofing Hammer Tool | Pneumatic Coil Nailer |
| Primary Use Case | Repairs, detail flashing, ridge caps, tight spaces | Large, open roof decks & high-volume installation |
| Setup & Equipment | Zero setup (No hoses, compressors, or power sources) | High setup time (Compressors, air hoses, extension cords) |
| Fastener Control | 🎯 Maximum (Zero risk of over-driving) | ⚡ Variable (Requires constant air regulator adjustment) |
| Portability & Safety | 🚀 Ultra-Portable (Hooks directly to tool belt) | ⚠️ Heavy, trailing air hoses can create trip hazards |
| Material Versatility | Asphalt, slate, cedar, synthetic, and copper flashing | Primarily standard asphalt shingles |
Conclusion: Elevate Your Roofing Craftsmanship
Mastering roof installation isn’t about working harder or swinging faster; it’s about employing purpose-built equipment with mechanical precision. By incorporating a high-performance roofing hammer tool into your exterior maintenance workflow, you increase your accuracy, protect your physical health, and ensure that every shingle installed stands up against harsh weather elements.
Are you preparing to tackle an upcoming roofing project, or do you have questions about choosing between titanium and drop-forged steel hatchets?
Drop a comment below with your project details, and let’s discuss the best setup for your home improvement goals!