
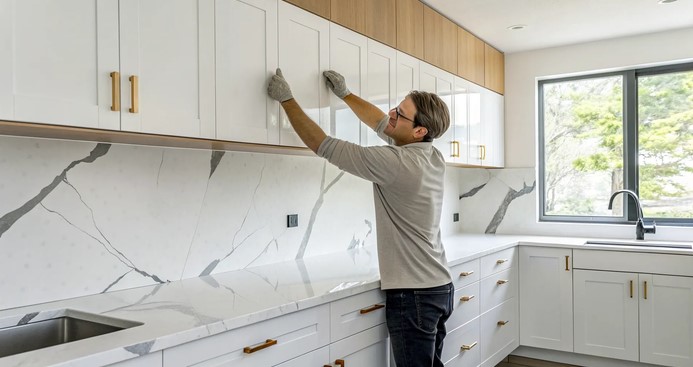
You step into your freshly renovated kitchen, admire the shimmering quartz countertops, and reach for a damp cloth to wipe down after dinner. But as you glance closely at the seam where the backsplash meets the counter, you notice it: a hairline black streak creeping along the joint. Within weeks, that subtle discoloration turns into a fuzzy patch of toxic black mold, and the wooden subfloor hidden beneath your custom cabinetry begins to swell.
I’ve had to break this bad news to far too many homeowners. On a kitchen restoration job in Seattle, I was brought in to investigate a subtle floor bounce in front of a luxury sink setup. When we peeled back the cabinetry, we discovered $12,000 worth of rotted subflooring and structural joist damage—all traced back to a tiny 1/16-inch gap where a previous contractor used rigid tile grout instead of flexible sealant along the backsplash transition.
Over my ten years in residential contracting and kitchen remodeling, I have seen that a home’s structural health often depends on the smallest details. Mastering flexible sealants using a dedicated backsplash caulk tube is your primary defense against moisture intrusion, subfloor decay, and persistent mold growth.
Elasticity vs. Rigidity: The Polymer Chemistry of Sealing
To understand why a backsplash caulk tube is essential for countertop transitions, you must examine how building materials respond to environmental changes. Houses are dynamic structures. Wood framing expands and contracts with seasonal humidity, heavy appliances cause minor floor deflections, and granite or quartz slabs settle under their own massive weight.
Using rigid tile grout along the plane change where the wall meets the counter is a recipe for failure. Grout has zero tensile elasticity; as soon as the countertop shifts by a fraction of a millimeter, grout cracks.
[ Countertop / Wall Plane Change ] ➔ [ Seasonal Structural Movement ]
                                                │
[ Rigid Tile Grout ]  ➔ [ Cracks / Fractures ]  ➔ [ Moisture Intrusion & Rot ]
                                                │
[ Flexible Caulk ]    ➔ [ Stretches / Flexes ] ➔ [ $100\%$ Watertight Seal ]
Think of caulk like a high-durability rubber shock absorber for your kitchen fixtures.
-
Elastomeric Memory: Premium sealants flex and compress during thermal expansion cycles without separating from the substrate.
-
Surface Adhesion: Formulated polymers form a chemical bond with smooth glazed ceramic tiles, glass, quartz, and stainless steel.
-
Fungicidal Barrier: Advanced kitchen sealants contain micro-biocides that resist black mold and mildew formation in humid kitchen microclimates.
Material Selection Guide: Silicone vs. Acrylic Latex vs. Hybrid Formulations
Grabbing the wrong backsplash caulk tube off the hardware store shelf will lead to peeling, yellowing, or paint incompatibility. You must match sealant chemistry to your specific backsplash material and aesthetic requirements.
| Sealant Type | Elasticity & Flexibility | Paintability | Mold / Water Resistance | Best Kitchen Application |
| $100\%$ Silicone | Exceptional ($>25\%$ movement) | Non-Paintable | Outstanding | Quartz, granite, and stainless steel seams |
| Siliconized Acrylic Latex | Moderate ($12-15\%$ movement) | Fully Paintable | Moderate to High | Dry wall transitions and painted backsplash trim |
| Advanced Polymer (Hybrid) | Superior ($>25\%$ movement) | Paintable (Select formulas) | Exceptional | High-moisture areas requiring color matching |
1. 100% Silicone: The Waterproof Gold Standard
Pure silicone provides unparalleled waterproofing and flexibility. Because it creates a non-porous, rubberized barrier, water simply beads off. However, standard silicone cannot be painted. If you need to paint the wall drywall directly above your caulk line, standard silicone will cause paint to bead up and fail.
2. Siliconized Acrylic Latex: The Easy-Clean Alternative
Siliconized acrylic offers easy water cleanup during application and accepts interior latex paint seamlessly. While slightly less flexible than pure silicone, it is ideal for sealing wood trim, wainscoting, and tile-to-drywall borders.
Application Logistics: Step-by-Step Caulk Bead Masterclass
Achieving a clean, smooth caulk line that looks like it was installed by a master craftsman requires strict prep work and mechanical control over your applicator gun.
Step 1: Substrate Preparation and Degreasing
Caulk will not adhere to dust, grease, or old silicone residue. Scrape away all old sealant using a sharp razor scraper, clean the joint thoroughly with isopropyl alcohol (91%), and allow it to dry completely.
Step 2: Nozzle Cut and Caulk Gun Setup
Cut the tip of your backsplash caulk tube nozzle at a $45^\circ$ angle using a sharp utility knife. Keep the opening small—roughly 1/8-inch in diameter. Pierce the internal foil seal using the puncture wire on your caulk gun.
[ Cut Nozzle at $45^\circ$ Angle ] ➔ [ Maintain Steady $45^\circ$ Gun Angle ] ➔ [ Tool Bead with Soapy Water / Alcohol ]
Step 3: Laying the Bead and Tooling
Hold the caulk gun at a $45^\circ$ angle to the joint. Pull the trigger with smooth, continuous hand pressure while moving along the seam at a steady pace. Immediately smooth (“tool”) the wet bead using a silicone caulking tool or a gloved finger dipped in a mixture of water and dish soap (for acrylic) or isopropyl alcohol (for pure silicone).
Expert Advice: Pro Tips & Hidden Pitfalls
PRO TIP: The Painter’s Tape Boundary TrickIf you struggle with shaky hands or uneven caulk lines, apply two parallel strips of low-tack blue painter’s tape—one on the countertop and one on the backsplash—leaving a precise 1/8-inch gap along the seam. Apply your sealant from the backsplash caulk tube, tool the bead completely smooth, and immediately peel the tape away at a $45^\circ$ angle while the caulk is wet. You will be left with a razor-sharp, professional seal.
Hidden Pitfalls to Avoid:
-
Caulking Over Wet or Damp Joints: Trapping moisture behind fresh caulk guarantees early adhesion failure and creates an ideal breeding ground for internal mold pockets. Use a moisture meter or hair dryer to ensure the joint is $100\%$ dry before sealing.
-
Over-Cutting the Tube Nozzle: Cutting the nozzle tip too large forces an excessive volume of caulk into the joint. This creates a messy, oversized bead that is difficult to tool cleanly and wastes material.
-
Using Expired Caulk Tubes: Caulk has a shelf life! Unopened caulk tubes older than 12–18 months can lose their curing catalysts, leaving you with a sticky, tacky gel that never hardens. Always check the expiration date stamped on the rim of the tube.
Protect Your Kitchen Remodel for the Long Haul
A beautiful kitchen renovation deserves equal parts aesthetic style and structural protection. Taking a methodical approach to sealing your tile transitions with the correct backsplash caulk tube guarantees that your counters, walls, and subflooring remain protected against invisible water damage.
Set aside an hour this weekend to inspect the seams around your kitchen countertops and bathroom vanities. Address minor cracks, replace failing grout lines with flexible caulk, and protect your home investment with confidence.
What state are the seals around your kitchen countertops in? Have you ever had to fix a cracked grout line along a backsplash? Drop your stories, photos, or questions in the comments below—let’s master home maintenance together!