
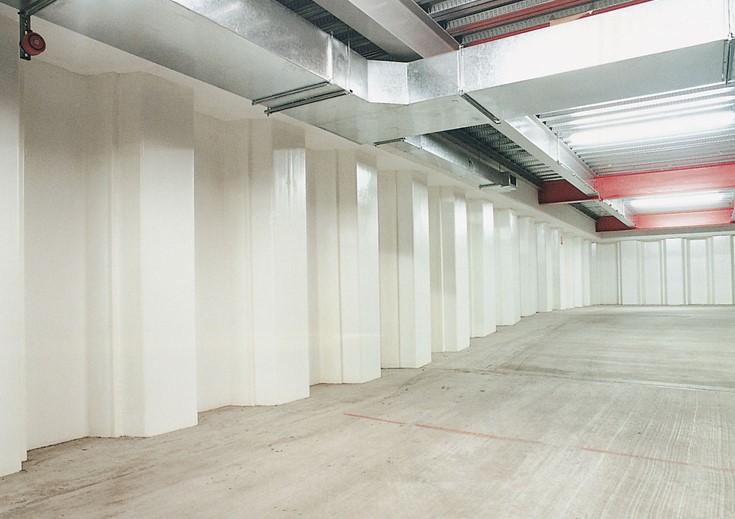
You walk down into your basement and see a vast, cavernous concrete footprint. It is currently serving as an expensive dumping ground for holiday decorations, old gym gear, and plastic storage totes. Meanwhile, upstairs, your family is competing for privacy, scrambling for quiet remote-work corners, or wishing for a dedicated guest suite.
I run into this exact wasted-potential scenario in nearly seven out of ten homes I inspect. Early in my contracting career, I worked on a split-level home where the owner was convinced they needed a $60,000 main-floor room addition to build a home office.
Instead of pouring new footings outside, we walked downstairs into their underutilized 900-square-foot cellar. By strategically framing a single, non-load-bearing basement partition wall, we carved out a soundproofed executive office and a separate mechanical storage room for less than a tenth of their original addition budget.
Over my ten years in residential framing, remodeling, and structural finishing, I have learned that converting raw below-grade space is the fastest way to add usable square footage to your property. Constructing a well-engineered divider wall is the single most important step in turning an echoing concrete cavern into functional living real estate.
Moisture Physics Below Grade: The Science of Partition Framing
To understand why framing a basement partition wall requires a different approach than above-grade framing, you have to look at subterranean moisture dynamics. Concrete foundation walls absorb ground moisture through capillary action, releasing water vapor into your subterranean air.
If you build a partition wall using standard lumber directly against raw concrete, you trap moisture inside closed wall cavities. Within months, wood rot sets in and mold spores begin to thrive behind your drywall.
[ Damp Earth / Subsoil ] ➔ [ Concrete Foundation Wall ] ➔ [ Capillary Vapor Transfer ]
                                                                     │
[ Protected Framing Assembly ] ◄── [ Vapor Barrier / Air Gap ] ◄────┘
Think of a basement partition wall like a specialized hull for an underwater vessel.
It must withstand thermal bridges, allow internal condensation to escape, and sit detached from direct contact with raw masonry.
-
Pressure-Treated Sill Plates: Standard framing lumber rots when placed on concrete. Ground-contact-rated pressure-treated bottom plates are non-negotiable to resist moisture wicking.
-
Floating Wall Clearance: Subterranean concrete floors heave and settle due to soil expansion. Framing walls with a $1/2$-inch gap at the top prevents floor-deflection stress from bowing your partition walls.
-
Thermal Isolation: Installing rigid foam insulation board (XPS) against outer concrete before framing interior dividing walls prevents warm room air from hitting freezing masonry walls.
Material Selection Matrix: Choosing the Right Framing Substrate
When planning a basement partition wall, choosing between traditional dimensional lumber and light-gauge steel studs dramatically impacts your project’s speed, straightness, and moisture resistance.
| Feature / Metric | Kiln-Dried Dimensional Wood Studs | Light-Gauge Galvanized Steel Studs | Mold-Resistant Drywall (Purple/Green) |
| Rot / Mold Vulnerability | Moderate to High (If exposed to leaks) | Impervious (Zero rot potential) | High Resistance (Core treated) |
| Dimensional Straightness | Prone to warping, twisting, and bowing | $100\%$ True and laser-straight | N/A |
| Structural Fastening Ease | Simple (Standard nailer/screws) | Requires self-tapping screws | Standard drywall screws |
| Acoustic Mass | Solid mass absorbs low frequencies | Lighter mass requires insulation | Added mass dampens sound |
| Cost Profile | Standard / Moderate | Slightly Higher initial material cost | Marginal premium over standard |
1. Galvanized Steel Studs: The Below-Grade Winner
While wood remains popular for traditional framing, galvanized steel studs offer superior performance below grade. Steel studs do not warp, attract termites, or support mold growth if your basement ever experiences high relative humidity ($RH$).
2. Moisture-Resistant Gypsum Board
Never use standard paper-faced drywall in a basement. Always wrap your partition frame in paperless or mold-resistant (Type X) gypsum panels, which feature fiberglass-reinforced facings that refuse to feed mold spores.
Acoustic Isolation Mechanics: Building True Privacy
A common beginner mistake when framing a basement partition wall is ignoring sound transmission. Because basements house clanking HVAC ducts, noisy water heaters, and overhead floor joists, sound easily bleeds through uninsulated partition assemblies.
[ Single Wood/Steel Stud Assembly ] ➔ [ Add Mineral Wool Batt Insulation ] ➔ [ Mount Resilient Channels ] ➔ [ Hang Double Gypsum Board ]
                                                                                                                     │
[ High STC Rating / Total Room Privacy ] ◄───────────────────────────────────────────────────────────────────────────┘
-
Mineral Wool Insulation (Roxul/R-13): Dense rock-wool batts absorb mid-to-high sound frequencies far better than traditional pink fiberglass rolls.
-
Resilient Sound Isolation Clips (RSIC): Decouple your drywall from the stud frame using metal channels. This breaks mechanical vibration transfer, keeping home theater rumble away from quiet office spaces.
-
Acoustic Joint Sealant: Apply non-hardening acoustical caulk along the top and bottom plates where the partition wall meets existing concrete floors and ceilings.
Step-by-Step Framing Logistics: Concrete Anchor to Ceiling Attachment
Erecting a stable partition wall requires a methodical attachment sequence to ensure structural rigidity without telegraphing floor movement.
-
Snap Layout Lines on Concrete: Measure out your floor plan, taking care to keep corners square using the classic $3\text{-}4\text{-}5$ right-triangle rule. Mark your tracks using a chalk reel.
-
Lay the Capillary Break: Lay down a continuous strip of 6-mil polyethylene sheet or foam sill sealer on the concrete floor before laying your pressure-treated bottom plate.
-
Anchor the Bottom Plate: Secure the sill plate to the concrete slab using a powder-actuated tool (RAMSET) or by drilling pilot holes for heavy-duty $3/16$-inch concrete screws (Tapcons) spaced every 24 inches.
-
Frame Wall Sections Flat: Assemble studs on 16-inch centers on the floor, raise the assembly into position, level it vertically with a spirit level, and anchor the top plate to overhead joists.
Expert Advice: Pro Tips & Hidden Pitfalls
PRO TIP: The “Floating Bottom Plate” Strategy for Active SoilsIf you live in an area with expansive clay soil, concrete floor slabs fluctuate vertically as groundwater levels shift. Build a floating partition wall by anchoring the bottom plate to the floor, securing a top runner to the overhead joists, and cutting vertical studs $3/4$-inch short. Connect the studs to the top plate using specialized sliding clips. This allows the concrete floor to rise and fall without crushing your finished drywall.
Hidden Pitfalls to Avoid:
-
Blocking Access to Utility Valves and Cleanouts: Never frame a solid partition wall directly in front of main sewer cleanout plugs, gas shutoff valves, or electrical panel clearance zones. Building codes strictly mandate a minimum 36-inch clear clearance in front of electrical breaker boxes.
-
Forgetting Top Plate Fire-Blocking: Unsealed gaps where partition walls meet overhead floor joists act as chimneys during a house fire. Always install solid $2\times4$ lumber fire-blocking or fire-rated expanding foam along top plates to slow the spread of smoke and flame.
-
Ignoring Return-Air Duct Ventilation: Enclosing small rooms with tight partition walls starves them of air movement. Ensure every newly framed basement room includes a dedicated supply register and return-air grill to prevent stagnant, damp air build-up.
Unlock Your Home’s Hidden Value
Transforming your unfinished subterranean footprint isn’t just about utility—it is about strategic real estate expansion. By mastering moisture isolation, selecting rot-proof framing materials, and constructing a rock-solid basement partition wall, you can double your home’s functional living space without the massive price tag of an exterior addition.
Take a trip down to your basement this weekend. Bring a tape measure and a roll of painter’s tape, outline your dream room dimensions on the concrete floor, and start planning your space upgrade.
What new room are you planning to add to your basement footprint? Have you encountered moisture or framing challenges during your basement project? Share your thoughts, questions, or ideas in the comments below—let’s build something great together!