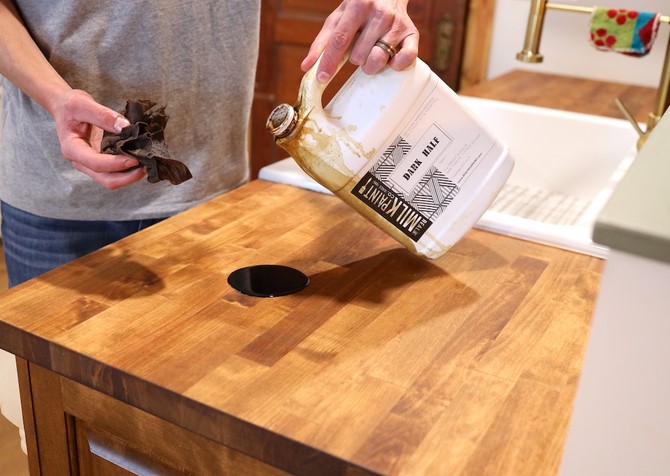
You spent weeks picking out the perfect walnut or maple countertop for your kitchen island. For the first few months, it was the absolute star of the house—warm, rich, and visually stunning. But lately, you’ve noticed it looking a little dull. Then, a splashed glass of water leaves a dark, permanent ring instead of pooling up on the surface. If you look closely near the sink, you might even see tiny, hairline fractures beginning to split the wood grain wide open.
Early in my home improvement career, a client called me out to inspect a gorgeous cherry island countertop I had installed just eighteen months prior. It was warped, dry as a bone, and split right down the center seam. The homeowner confessed they had been cleaning it daily with harsh dish soap and had never once conditioned the wood. Seeing that magnificent timber ruined broke my heart, but it taught me a permanent lesson: hardwood is an organic, living surface that needs to breathe, hydrate, and be protected.
Unlocking the full lifespan of your wooden countertops or cutting surfaces requires a deliberate preservation routine. The undisputed hero of this maintenance cycle is high-quality butcher block oil. Whether you are a beginner looking to protect your first cutting board or an intermediate DIYer maintaining a full kitchen of wooden counters, let’s dive deep into the science and application of proper wood lifecycle management.
The Biological Need: Why Wood Requires Deep Hydration
To understand why a raw wooden surface degrades, you have to realize that wood behaves exactly like human skin. Even after a tree is harvested, milled, and turned into a countertop, its cellular structure remains highly reactive to its environment.
The Organic Sponge Analogy
Think of a hardwood surface like a giant, dense sponge. If the sponge is completely bone-dry, it becomes brittle and shrinks. If you dump water on it, it violently expands, swells, and warps.
When you apply butcher block oil, you are essentially saturating the wood’s microscopic pores with a stable, hydrophobic (water-repelling) barrier. The oil fills the cellular voids, locking out external moisture while preventing the natural internal moisture from evaporating. This deep hydration stops the wood from cycling between extreme expansion and contraction, which is the root cause of warping and splitting.
Chemistry in the Kitchen: Selecting Your Conditioning Agents
Walking down the finish aisle at your local home improvement center can be overwhelming. Not all wood oils are safe for surfaces that come into direct contact with food.
Food-Grade Mineral Oil vs. Vegetable Oils
Never grab olive, canola, or corn oil from your pantry to condition a wooden countertop. These are unsaturated fats that oxidize over time when exposed to oxygen, turning rancid, sticky, and incredibly foul-smelling.
True butcher block oil relies on pure, food-grade white mineral oil. It is a highly refined petroleum byproduct that is completely inert, clear, colorless, and guaranteed never to spoil or harbor bacteria.
The Synergy Blend: Oil and Beeswax
While pure mineral oil penetrates deep into the wood grain, it lacks staying power on its own. For maximum efficiency, I always recommend a blend that pairs mineral oil with natural beeswax or carnauba wax.
| Component Type | Penetration Depth | Surface Protection | Principal Function |
| Pure Mineral Oil | Deep (Cellular Level) | Minimal | Hydrates wood fibers internally |
| Beeswax / Carnauba | Shallow (Surface Layer) | High (Water Barrier) | Seals pores, fills knife marks, adds a satin sheen |
The oil sinks deep into the timber, while the wax stays on the surface, buffing to a gorgeous, water-resistant satin sheen that deflects daily liquid spills.
The Pro Execution: A Step-by-Step Maintenance Protocol
Applying butcher block oil isn’t difficult, but doing it correctly requires patience and proper substrate preparation. Follow this field-tested application sequence for optimal results.
Step 1: Substrate Preparation and Sanding
Before applying a single drop of oil, the wood must be clean and bone-dry. If the surface has minor knife scratches, stains, or a rough texture, sand it lightly along the direction of the wood grain using 220-grit sandpaper. Vacuum away all fine dust and wipe the surface down with a tack cloth.
Step 2: The Flood Coat
Do not be stingy with the product. Pour a generous amount of butcher block oil directly onto the wood. Using a lint-free microfiber cloth or a clean shop towel, spread the oil evenly across the entire surface, ensuring the wood grain looks completely saturated and wet.
Step 3: The Absorption Phase
Let the oil sit undisturbed for 20 to 30 minutes. Watch closely; you will notice highly porous zones (like end-grain sections) drinking up the oil rapidly, leaving dry patches. Apply more oil to those thirsty areas to ensure uniform saturation.
Step 4: The Final Buffing
After the wood has absorbed all it can take, use a fresh, dry cloth to vigorously buff away all excess surface oil.
🛠️ Pro Tip: Keep buffing until the surface no longer feels sticky or greasy to the touch. If you leave a thick layer of wet oil sitting on top of the wood, it won’t sink in—it will just act like a dust magnet, creating a hazy, gummy mess that you’ll have to scrape off later.
Avoiding the Silent Pitfalls of Wood Care
Over the last decade, I have rescued dozens of wooden surfaces from catastrophic maintenance failures. Keep these hidden realities in mind:
-
The Soap Trap: Commercial dish soaps contain aggressive chemical degreasers designed to break down oil on your dinner plates. Unfortunately, they also strip away your butcher block oil with every single wipe. To prolong the life of your finish, clean your wood surfaces with a damp cloth and mild, pH-neutral soap, or use a 50/50 mixture of white vinegar and water for natural disinfection.
-
The “Once a Year” Fallacy: Wood maintenance isn’t a seasonal event. A great way to test your finish is the Water Droplet Test. Drop a few beads of water onto your wood. If they bead up tightly like marbles on a freshly waxed car, your finish is intact. If the water spreads out and starts soaking into the wood grain within 60 seconds, it is time to reapply your oil immediately.
Conclusion: Honor the Material, Reap the Rewards
Managing the lifecycle of your wooden countertops isn’t a chore—it’s a rewarding ritual that honors the organic beauty of the material. By treating your timber with high-quality butcher block oil, protecting it from aggressive cleansers, and reapplying whenever the wood gets thirsty, you ensure that your kitchen remains warm, beautiful, and structurally sound for generations to come.
What kind of wood surfaces do you have in your home right now? Are you trying to revive an old cutting board, or keeping a new set of countertops pristine? Let me know your setup and any wood care challenges in the comments below, and let’s troubleshoot your maintenance routine together!